Easy Piano Cake Tutorial and Recipe Ideas
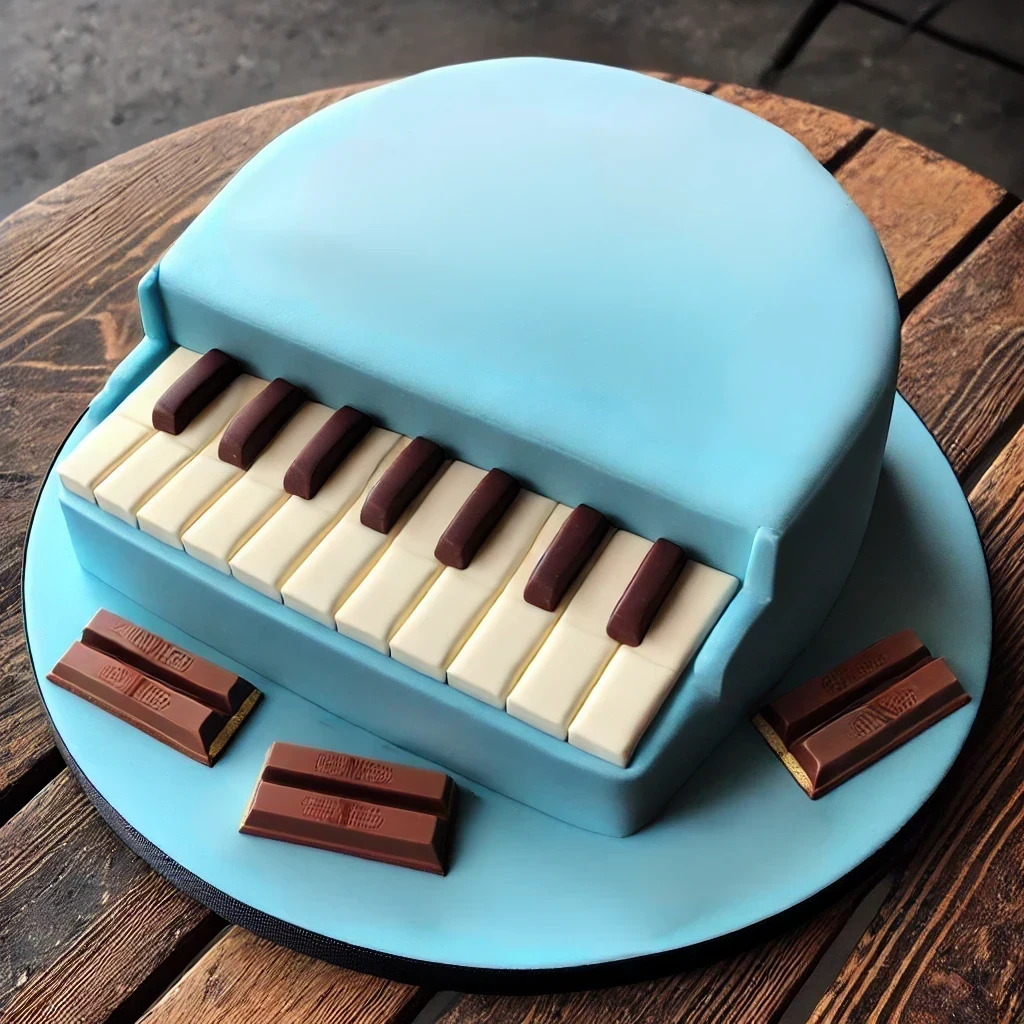
Baking a piano cake design can be thrilling yet daunting. The complexity of carving the cake, assembling the structure, and meticulously decorating each part of the piano cake design can easily overwhelm even the most dedicated bakers. This guide simplifies the process, providing clear instructions and practical tips for a stunning piano cake design. You will find step-by-step guidance on each phase, from preparing the cake base to crafting intricate details and decorations. Dive in and transform your baking experience into a creative adventure, ensuring a delightful outcome.
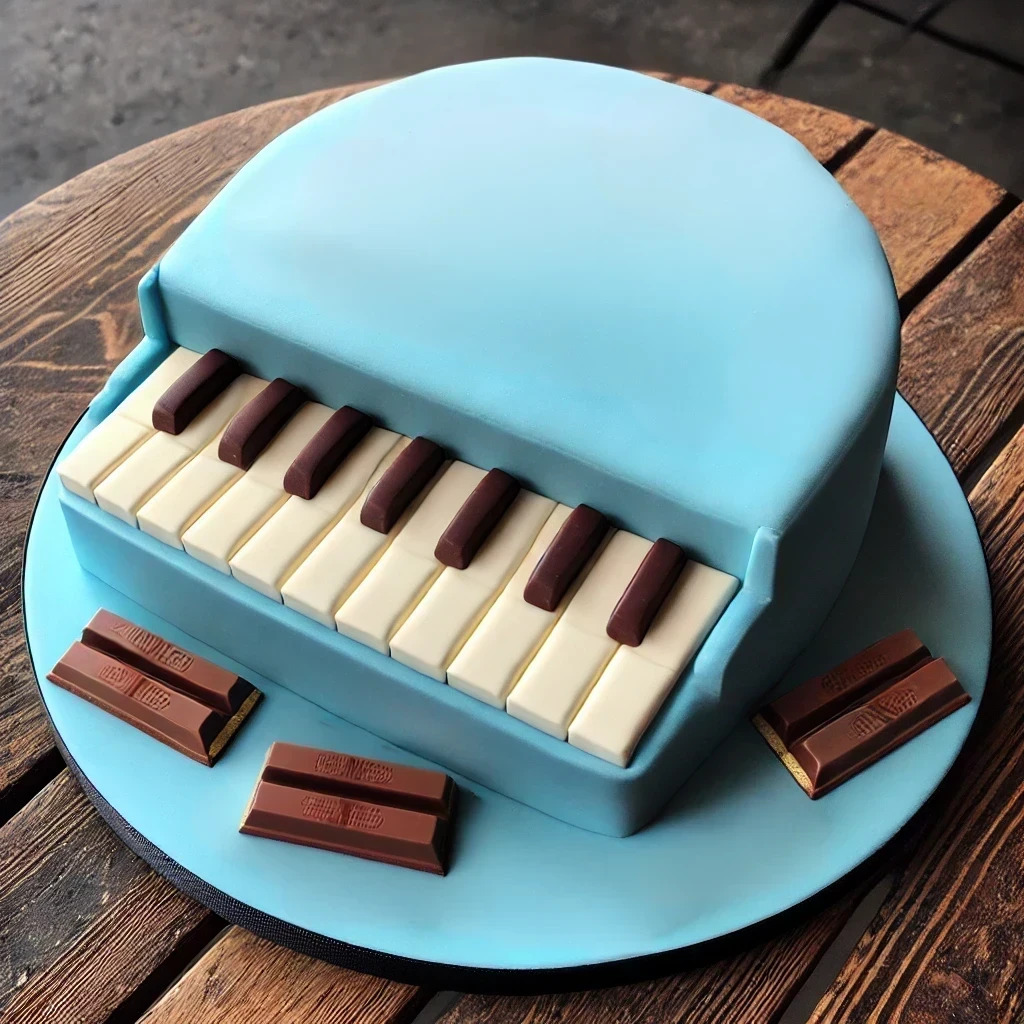
Materials and Ingredients for Piano Cake

Essential Baking Tools and Materials
- Oven Thermometer: Ensuring your oven is precise with its temperature is crucial for evenly baked cakes.
- Electric Mixer: A stand or hand mixer is indispensable for efficiently mixing cake batter and other components.
- Digital Food Scale: it is essential to deal with grams instead of cups for accurate measurements.
- Silicone Baking Mats: prevent cookies and cakes from spreading too much and make cleanup a breeze.
- Round Cake Tins: Heavy-duty, preferably springform tins for easy cake release.
- Measuring Cups and Spoons: Use dedicated liquid and dry measuring cups and spoons for accurate measurements.
- Spatula Set: Includes silicone and offset spatulas for scraping and smoothing.
- Wire Cooling Racks: These are efficient for cooling your cake after baking.
- Food Processor: Optional, but handy for making fondant or processing other ingredients.
- Parchment Paper or Nonstick Foil: Essential for lining your pans, ensuring an easy cake release.
- Cake Leveler: Ensures even cake layers, which is crucial for a multi-layer piano cake.
- Turntable: Useful for decorating and displaying the cake.
- Piping Bags and Tips: Necessary for intricate designs, especially the piano keys.
- Modeling Tools: You use these to shape and detail fondants or model chocolate.
- Bench Scraper and Offset Serrated Knife: Use these to smooth buttercream and fondant and carve the cake into the desired piano shape.
Ingredients List for the Cake Base
- Flour: All-purpose flour is the base for most cake recipes.
- Sugar: Granulated sugar is standard, but some recipes may call for brown sugar.
- Eggs: Depending on the recipe, you may need whole eggs or separate the yolks and whites.
- Butter or Oil: Unsalted butter or vegetable oil to provide moisture and flavor.
- Milk: Whole milk, buttermilk, or a non-dairy alternative.
- Baking Powder/Baking Soda: Essential for helping the cake rise.
- Salt: To balance out the flavors.
- Flavorings: Vanilla extract or other flavors to enhance the taste.
- Cocoa Powder: Unsweetened cocoa powder is vital when making a chocolate version.
- Boiling Water: Used in some chocolate cake recipes to enhance flavor and texture.
- Alternative Flours: For gluten-free options, mix almond flour, coconut flour, and arrowroot flour with xanthan gum.
Ingredients for Decorations and Fondant
- Fondant: Pre-made in various flavors and colors available in the market, or you can make your own.
Homemade Fondant Ingredients :
- Powdered Sugar: The main ingredient.
- Corn Syrup: To achieve the right texture.
- Gelatin: Adds structure and stability.
- Water: Mix with the sugar and gelatin.
- Food Coloring: For customizing the color.
- Buttercream or Royal Icing: For additional decorations and details.
- Buttercream Ingredients :
- Butter: Unsalted and softened.
- Powdered Sugar: For sweetness and thickness.
- Milk or Cream: To achieve the right consistency.
- Flavorings: Vanilla extract or others.
Royal Icing Ingredients :
- Powdered Sugar: The main ingredient.
- Egg Whites: To create a stable icing.
- Lemon Juice or Water: To thin the icing.
- Edible Markers or Paint: For fine details on the cake.
- Miscellaneous Cake Decorations: Fondant shapes, piped borders, etc.
- KitKat Bars: Often used to create the black keys of a piano.
- Modeling Chocolate: For detailed work like the piano keys.
- Wood-Grain Fondant: If you’re aiming for a realistic piano look, using fondant colored to resemble wood grain is a great option.
Also, read our blog on a step-by-step guide to making truck cake.
Let’s dive deep into cake-based preparation.
Step-by-Step Cake Base Preparation

Creating the base for your piano cake is fundamental to achieving a delicious and visually appealing result. Let’s break down the process from preparing the batter to cooling and trimming the cake for a flawless finish.
Preparing the Cake Batter
You can either use a premix or make the batter from scratch. If you opt for a store-bought mix, simply follow the instructions on the box, which typically involve adding eggs, oil, and water. However, if you’re keen on a homemade version, here’s a reliable recipe to get you started:
- Combine Dry Ingredients: Sift 1¾ cups of flour, ¾ cup of unsweetened cocoa powder, 1½ teaspoons of baking powder, 1½ teaspoons of baking soda, 2 cups of sugar, and 1 teaspoon of salt. This sifting process ensures even mixing and removes any lumps.
- Whisk Wet Ingredients: In a separate bowl, whisk together 2 eggs, 1 cup of milk, ½ cup of canola oil, and 2 teaspoons of vanilla extract. Mix until thoroughly combined.
- Mix Dry and Wet Ingredients: Gradually combine the wet mixture with the dry ingredients, stirring gently to avoid overmixing. Finally, add 1 cup of boiling water to the mixture. This will result in a smooth and pourable batter.
Baking Instructions
Preheat your oven to 350°F (175°C) to ensure it’s at the right temperature when baking. Grease a rectangular or square cake pan thoroughly with butter and dust it lightly with flour to prevent sticking. Alternatively, line the pan with non-stick foil or parchment paper for easier release. Pour the batter into the prepared pan. If you use an 11 x 7-inch brownie pan, bake for 25 to 30 minutes. For a 9 x 13 pan, extend the baking time to approximately 35-38 minutes. Regardless of the pan size, rotate it halfway through baking to promote even cooking. Check for doneness by inserting a toothpick or cake tester into the center. If it comes out clean, your cake is ready. If not, bake for a few more minutes and test again.
Cooling and Trimming the Cake
After baking, allow the cake to cool in the pan for about five minutes. Then, transfer it to a cooling rack to cool completely; this helps prevent the cake from becoming soggy. Depending on the cake size, the complete cooling period can range from 30 minutes to an hour depending on the cake size.
For ease of frosting, it is helpful to freeze the cake layers after they have cooled. Simply wrap the cooled cake in plastic and place it in the freezer for 30 minutes. This can help minimize crumbs mixing into your frosting.
When the cake is thoroughly cooled, it’s time to trim it to achieve your desired piano shape. Use a long serrated knife or a cake leveler to remove bulges from the top. Ensure the cake is flat on the bottom as well. You may also need to trim the sides of a piano keyboard to get a neat rectangular shape. If the cake is too thick, split it into layers by cutting through the middle horizontally. This will help achieve the desired height and make layering easier when assembling the final cake.
Watch this step-by-step tutorial on how to create a surprise piano cake using fondant.
Check out our simple guide on buttercream cake design.
Let’s turn your cake base into a piano shape.
Making and Shaping the Piano Base
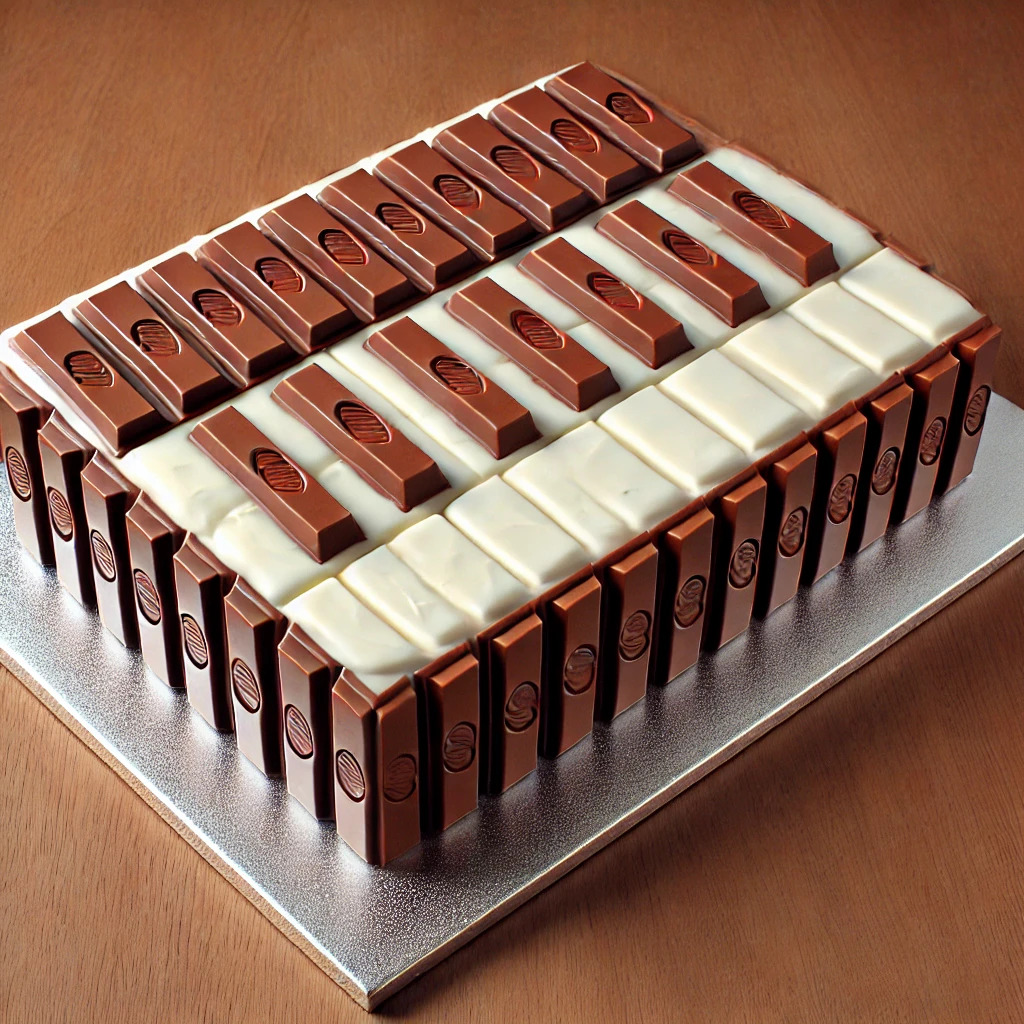
Creating a piano-shaped cake might sound challenging, but with the proper steps, you can turn a simple baked treat into an impressive edible work of art. Here’s how to shape and stabilize your piano cake.
Carving the cake into a piano-shape
Using a rectangular pan is the key to starting with a solid base. This shape resembles the white keys of a piano, making it easier to carve the distinct piano features. You can use a common choice, which is an 11 x 7-inch brownie pan. This specific dimension matches the size of piano keys, simplifying your task. Once your cake is baked and sufficiently cooled, turn it upside down. This ensures you have a perfectly flat surface to work with. Now, it’s time to ice your cake. Use vanilla butter icing for this part. This technique provides a sleek finish, essential for mimicking the polished look of piano keys.
Next, it’s time to carve out the keys. Use the edge of a butter knife to score the white keys into the icing. You don’t have to be overly precise, but evenly spaced cuts will make it look more realistic. For the black keys, KitKat bars are an excellent choice. Break them apart and arrange them in groups of two and three, replicating the pattern seen on an actual piano.
Assembling the piano structure
Consider making a layered piano cake if you’re up for a more intricate design. Bake separate layers and freeze them. Freezing makes the cake layers sturdier and easier to handle. When stacking them, use frosting as an adhesive—a crumb coat helps stabilize the structure. After applying the crumb coat, chill the cake before adding the final layer of frosting. This additional step ensures your cake won’t collapse under its weight.
Stabilizing the base with support
Adding decorations like the KitKat black keys can be tricky, but a small drop of melted chocolate works wonders as edible glue. It helps keep the decorations secure without affecting the overall aesthetic.
Remember to trim the edges of the cake for a neat, symmetrical shape. This final touch ensures that your piano cake maintains a professional look and enhances its resemblance to an actual piano.
Read our blog on a step-by-step guide to butterfly cake.
Let’s discuss intricate elements for decorating the piano cake.
Creating Decorative Elements
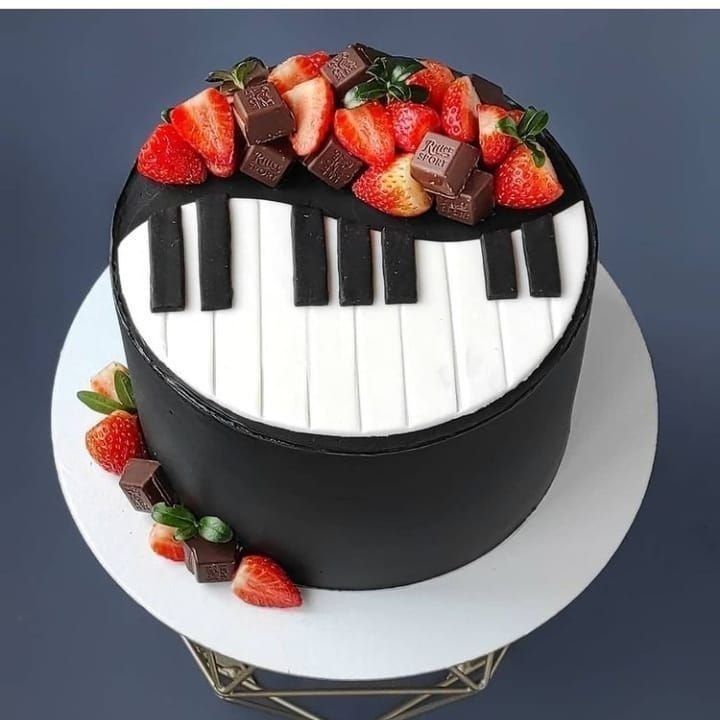
Here’s a step-by-step guide to help you bring your piano cake to life with realistic keys, pedals, and other intricate elements.
Making the Piano Keys
The piano keys are the main highlight of your cake, and crafting them well can define the overall look and feel of the design.
Here are two methods for creating them:
Kit Kat Method
- White Keys: Use white Kit Kat bars. Place them in a row to replicate the whole octave of a piano. Secure them with a small drop of melted chocolate or buttercream to keep them in place.
- Black Keys: Trim milk chocolate Kit Kats into smaller pieces. Arrange them in groups of two and three on top of and between the white Kit Kat bars to mimic the black keys. Use melted chocolate to secure them.
Modeling Chocolate/Fondant Method
- White Keys: Roll out white modeling chocolate or fondant to about ¼ inch thick. Use the edge of a butter knife or a flat sculpting tool to press evenly spaced notches into the strip, imitating the gaps between the keys.
- Black Keys: Roll out black modeling chocolate or fondant and cut small strips. Arrange these on top of and between the white keys. For added realism, create slight indentations on the white keys with a toothpick to mimic the texture of real piano keys.
Crafting Pedals and Other Details
For those extra touches that make the piano complete, here’s how to craft and secure the pedals and other components:
Pedals
- Materials: Use fondant or modeling chocolate.
- Design: Roll out small pieces and shape them into the pedal form. Add texture using a texture mat or a small tool for a more realistic appearance.
- Painting: Paint the pedals using edible paint or dust. If you have airbrush equipment, this can add an extra smooth finish.
Music Stand and Piano Lid
Use cardboard or foam board shaped to size and covered in sugar paste for the lid and interior. Attach these elements with toothpicks or edible glue. Ensure proper support so they stay in place.
Candelabras and Candles
Make small candelabras and candles out of fondant or sugar paste to add an ornate touch to your piano.
Decorative Edges
Use a fondant border or a piping bag with a decorative tip to create edges around the piano. This can add a contrast in color to highlight the details.
Using Fondant for Smooth Surfaces
Fondant creates a polished, professional look for the piano. Here’s how to achieve that smooth finish:
- Preparation: Ensure the cake is crumb-coated and chilled. This helps the fondant adhere seamlessly.
- Application: Roll out the fondant to about 2-4 millimeters thick and drape it over the cake, smoothing it out with a fondant or comb. Use a sharp knife to cut away any excess.
- Detailed Designs: For intricate patterns, like a checkerboard design on the board, use small square cutters to cut out ivory and wood-colored sugar paste squares. Lay these in a checkerboard pattern and trim away the excess for a clean look.
Also, read our blog on unique castle cake ideas.
Let’s learn some essential techniques and tips to help you create a masterpiece.
Decorating Techniques and Tips
Applying buttercream or fondant
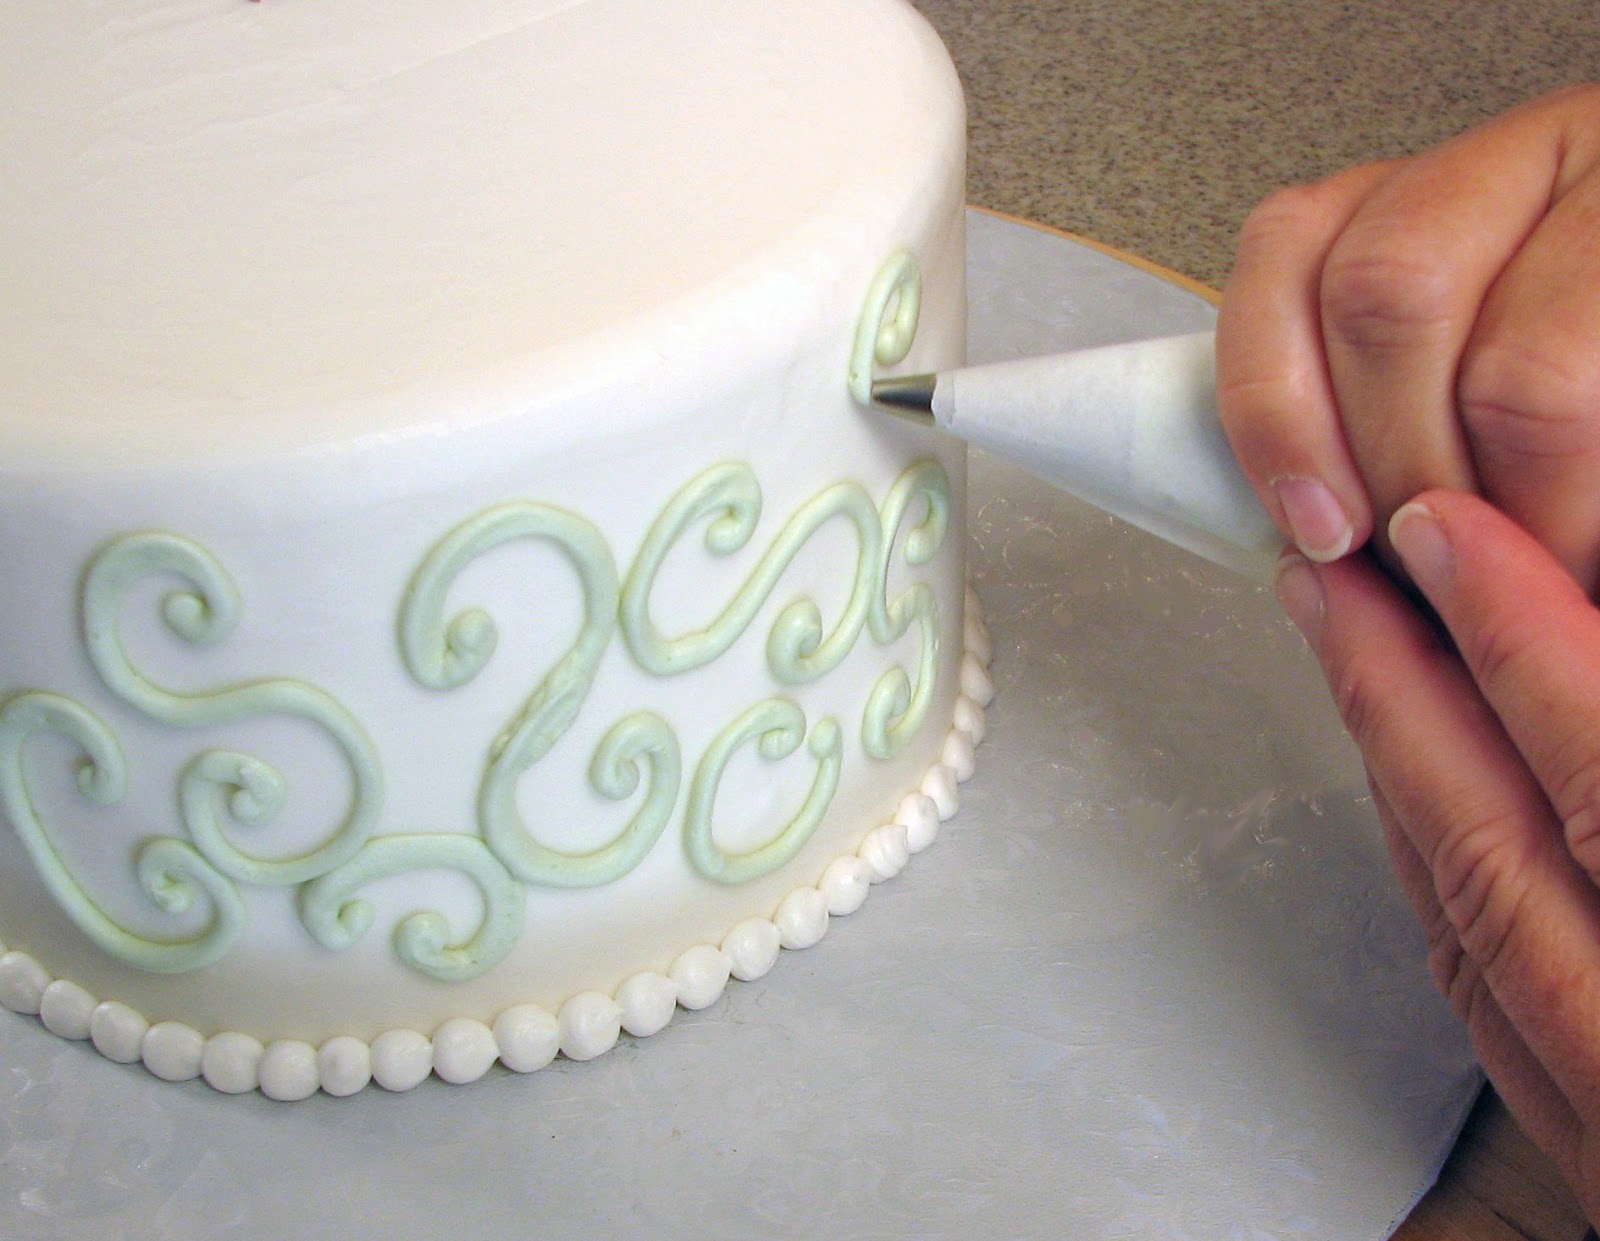
Buttercream: To start with a smooth buttercream surface, ensure your butter is at room temperature and sift the icing sugar. This will give you an even layer of icing that adheres to the cake. Begin with a crumb coat, which is a thin layer of buttercream. Chill the cake for at least 30 minutes to set this first coat, preventing crumbs from mixing into your final layer.
Use a small offset spatula to apply the buttercream, followed by a bench scraper to smooth and shape it. Work on an inverted pizza pan for the best results, allowing you to apply and smooth the buttercream evenly all around.
Fondant: Before you start with fondant, ensure your cake is completely covered with a layer of buttercream or ganache to help the fondant adhere. Knead the fondant until it’s pliable; this helps cover the cake smoothly without tearing it. Use a fondant smoother to press the fondant gently, getting rid of any air bubbles or wrinkles. If you find bubbles, you can prick them gently with a pin to release the air.
Adding Details with Royal Icing
Royal icing is perfect for detailed decorations like piano keys or musical notes. Ensure the consistency is right—neither too thin nor too thick. Use a piping bag with a small round tip (like a #1 or #2) to create precise lines and intricate details. Allow the royal icing to set completely before handling the cake to maintain the design’s integrity.
Edible paints and markers
Edible paints can bring color and life to your cake. Use a small brush to apply the paint in thin layers, letting each layer dry before adding more to prevent the paint from running. A layer of confectioner’s glaze can seal the paint and add a glossy finish.
Edible markers are excellent for quickly adding fine details. They work well for small elements like music notes or treble clefs. Always test the marker on a small area first to ensure smooth ink flow and prevent bleeding. Combine these markers with fondant or royal icing techniques to create a more detailed and visually appealing design.
Read our article on delicious buttercream cake ideas.
Let’s explore some recipe ideas for making stunning and delicious piano cakes.
Alternative Recipe Ideas

Here are some alternative recipe ideas to accommodate different tastes and dietary needs, ensuring your piano cake creation is visually stunning, delicious, and inclusive.
Chocolate Sponge Cake Variation
The Piano Layer Cake with Chocolate Sponge is a must-try for a chocolate lover. The recipe is straightforward, but the cake is moist and rich with every bite.
Ingredients
- 1¾ cups flour
- ¾ cup unsweetened cocoa powder
- 1½ teaspoons baking powder
- 1½ teaspoons baking soda
- 2 cups sugar
- 1 teaspoon salt
- 2 eggs
- 1 cup milk
- ½ cup canola oil
- 2 teaspoons vanilla extract
- 1 cup boiling water
Instructions
- Preheat the oven to 350°F. Line a 9×13 pan with nonstick foil.
- Sift the flour, cocoa powder, baking powder, baking soda, sugar, and salt in a large bowl.
- Whisk in the eggs, milk, oil, and vanilla extract.
- Mix the boiling water well until the batter is smooth.
- Pour the batter into the prepared pan and bake for 35-38 minutes, or until a cake tester comes out clean. You can easily make this a double-layer cake by repeating the recipe and stacking one cake on top of the other with a layer of frosting in between.
Sugar-Free and Gluten-Free Options
Those with dietary restrictions can still enjoy a delicious piano cake. Here’s a simple Gluten-Free Piano Cake.
Ingredients
- ½ cup Bob’s Red Mill All Purpose Baking Flour
- ½ cup almond flour
- ½ cup coconut flour
- ½ cup arrowroot flour
- ¾ teaspoon xanthan gum
- 3 teaspoons baking powder
- ½ teaspoon salt
- ⅔ cup softened butter
- 1 cup sugar (or sugar substitute for a sugar-free version)
- 2 eggs
- ¾ cup milk (cow’s, rice, or coconut milk)
- 1 teaspoon vanilla extract
Instructions
- Preheat your oven to 350°F (175°C).
- Combine the dry ingredients in one bowl and the wet ingredients in another.
- Mix the dry and wet mixtures with the butter and sugar until well mixed.
- Pour the batter into an 11×7-inch brownie pan and bake for 25-30 minutes. Consider using natural sweeteners such as stevia or erythritol for a sugar-free version. Remember that these substitutes affect the texture.
Flavor Enhancements and Substitutions
Adding flavor enhancements can take your piano cake to a whole new level. Consider a Chocolate Chip Meringue or a rich Chocolate Ganache.
Chocolate Chip Meringue:
- 6 large egg whites
- 2 cups superfine sugar
- 1 cup mini chocolate chips
Whip the egg whites until soft peaks form, then gradually add the superfine sugar. Fold the mini chocolate chips into the mixture, then bake it until the meringue sets and crisps.
Chocolate Ganache:
- 2 cups dark chocolate chips
- 1 cup heavy cream
- 2 tablespoons coconut oil
Heat the cream until simmering, pour over the chocolate chips, and stir until smooth. The coconut oil adds a lovely sheen and soft texture. For added personalization, try these substitutions and flavor twists:
- Substitute cow’s milk with almond, soy, or oat milk for a non-dairy option.
- Use coconut oil or vegan butter instead of butter for a dairy-free cake.
- Enhance vanilla butter icing with high-quality vanilla extract, or add a touch of almond or lemon extract for a unique flavor.
Next, discuss tips and tricks to enhance the piano cake.
Get more insights by reading our blog on fondant cake and cream cake.
Watch this detailed piano cake tutorial, from the chocolate cake recipe to the final decoration with Kit Kats.
Additional Tips and Tricks

Here are some valuable tips and tricks to enhance your piano cake-making journey.
Quick Clean-Up Tips
Cleaning up after baking can be one of the most daunting tasks. However, with a few strategic practices, you can minimize mess and ensure a smooth baking experience:
- Work on a Clean Surface: Keeping your workspace clutter-free makes the process more enjoyable, helps prevent cross-contamination and makes cleaning easier.
- Cover Your Workspace: Use parchment paper or silicone mats to catch spills and crumbs. This will make it easy to gather and dispose of the mess quickly.
- Use the Right Tools: An offset serrated knife and a bench scraper help you make clean cuts and smooth surfaces, reducing the amount of crumbs.
- Chill the Cake: Freezing or chilling the cake before carving and decorating makes it firmer and easier to handle, reducing the mess significantly.
- Clean as You Go: Regularly clean your tools and workspace to prevent frosting and crumbs from building up.
Handling Baking Emergencies
Baking emergencies can happen despite your best efforts. Here are some solutions to common problems:
- Uneven Baking: Ensure your oven is at the correct temperature, and use a cake tester to check for doneness. Rotating the cake pans halfway through the baking time can also help.
- Cake Sinking: If your cake sinks, you can still salvage it by levelling it and using a generous amount of frosting to cover imperfections. Applying a crumb coat can also help trap crumbs.
- Crumb Coat: Applying a thin crumb coat before the final layer of frosting can make your cake look smoother and more professional. Chill the cake after the crumb coat to set the frosting.
Improving Cake Stability
Here are some tips to enhance stability:
- Freezing Layers: Freezing cake layers after baking helps stabilize them and makes assembly easier, preventing potential collapse.
- Internal Supports: For tall or multi-layered cakes, inserting dowels or skewers can add structural strength. Position them carefully to ensure they don’t compromise the cake’s integrity.
- Base Plate: Use a sturdy cake board or thick cardboard base to support the entire cake structure, which helps prevent toppling.
- Chill After Assembly: Chilling the assembled cake allows the frosting to set and the cake to stabilize.
- Even Cooling: Allow the cake to cool evenly to avoid warping or cracking. Cooling the cake in the pan for a few minutes before transferring it to a wire rack can help.
Read our complete guide on fondant cake and cream cake.
Frequently Asked Questions
Q: How do I make a piano cake at home?
A: You typically bake a cake in a rectangular or grand piano-shaped pan to make a piano cake. After baking, you can use icing or fondant to create the piano keys, adding KitKat or similar chocolate bars for the black keys. Decorations like fondant musical notes, roses, or a piano lid can enhance the design.
Q: What ingredients do I use for decorating a piano cake?
A: Common ingredients include:
- Vanilla or chocolate buttercream for the base
- Fondant or icing to create piano keys
- KitKat bars or dark chocolate for the black keys
- Edible musical note decorations or fondant for added flair
Q: What pan should I use for a piano cake?
A: You can use a rectangular cake pan for a simple piano cake design or a specialized grand piano-shaped pan for more intricate designs. A typical rectangular pan size is 11 x 7 inches for easy carving and decoration.
Q: Can I make a piano cake without fondant?
A: Yes, you can make a piano cake without fondant. Buttercream or other types of frosting work well for covering the cake. You can still create piano keys using icing and chocolate bars for the black keys.
Q: How do I add decorations like musical notes to a piano cake?
A: You can create musical notes using fondant, edible pens, or chocolate molds. These decorations can be placed on the cake or used around the edges for an extra musical theme.
Q: How do I make sure the piano cake looks realistic?
A: Focus on evenly spaced and well-defined piano keys to make the cake look realistic. Chocolate bars for black keys and smooth icing for white keys help create a neat appearance.
Q: Can I customize a piano cake for special occasions?
A: Yes, piano cakes are highly customizable. You can personalize them with colors, names, or themed decorations like musical notes, edible flowers, or even a piano lid made of fondant.
Q: How far in advance can I make a piano cake?
A: Make a piano cake 1-2 days in advance. If you use fondant or buttercream, store the cake in a cool, dry place or the fridge to keep it fresh. Decorations like chocolate or fondant should be added closer to the event to maintain their shape and texture.
Q: Can I order a custom piano cake from a bakery?
A: Yes, WarmOven offers custom piano cakes. You can specify the design, size, and decorations, and the bakery will create the cake according to your preferences.
Conclusion
Let’s quickly recap what we’ve covered as we wrap up our Easy Piano Cake Tutorial and Recipe Ideas. We’ve walked you through detailed steps to create your piano cake, offering various recipes catering to diverse tastes. The beauty of these recipes lies in their flexibility, allowing you to experiment and add your creative touches.
We’d love to see your masterpieces! Share your piano cake creations and experiences on social media, and use specific hashtags to make your work easily discoverable.
Remember to provide feedback on the recipes and tutorials you’ve tried. Your input is invaluable and helps refine and improve the content for future bakers.
If you need more time or want to impress with a professionally made cake, WarmOven is here to help. We offer freshly baked cakes for all occasions, with hassle-free 2-hour doorstep delivery for regular cakes and 1-day delivery for custom creations. Enjoy a 10% discount on orders above ₹700/-. Whether it’s a birthday, anniversary, or special event, WarmOven makes bringing your cake vision to life easy.

