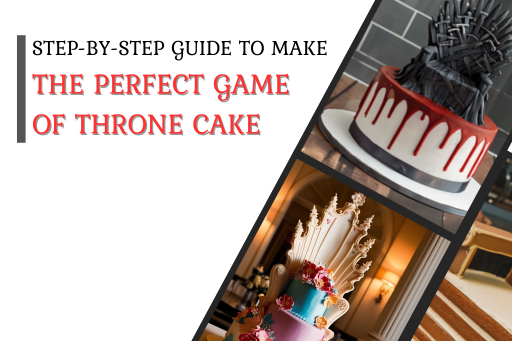
Step-by-Step Guide to Make the Perfect Game of Throne Cake
Winter is coming, and so is the most epic cake you’ve ever made! If you’re a Game of Thrones fan, why not bring the magic of Westeros straight to your dessert table? Whether for a themed party, a birthday, or just because you love the show, this cake will steal the spotlight.
You don’t have to be a professional baker to make it! Even if you’re a beginner at baking, you can easily create this simple yet stunning cake and make your party a hit! This blog will help you make the perfect epic Game of Thrones cake that will leave everyone in awe and be Instagram-worthy, too.
So, get your apron on and bring the Seven Kingdoms to life—one slice at a time!
Step-by-step Game of Thrones Cake Recipe

Creating a Game of Thrones-inspired cake is an exciting challenge that lets you bring the iconic Iron Throne to life in edible form. Whether you’re a seasoned baker or a beginner, this step-by-step guide will help you craft a stunning and Instagram-worthy cake that will leave everyone in awe.
Let’s create a Game of Thrones cake that looks as legendary as the show!
1. Tools and Ingredients

For the Cake Base:
- 2 ½ cups all-purpose flour
- 1 ¾ cups granulated sugar
- 1 cup unsalted butter (room temperature)
- 4 eggs
- 1 cup buttermilk
- 1 teaspoon baking powder
- ½ teaspoon baking soda
- ½ teaspoon salt
- 1 tablespoon vanilla extract
- ½ cup cocoa powder (if making a chocolate cake)
For Decorating:
- 1 ½ lbs white fondant
- Black and red Food Coloring
- Silver Color Mist Sugar Spray
- large lollipop sticks.
- White chocolate or candy melts (about 1 cup)
- Heavy cream (½ cup)
Tools:
- Teaspoon
- Paring Knife
- Rolling Pin
- Frosting Spatula
- Serrated Knife
- Sturdy Cake Board or Pan to Prepare and Present Cake on.
- Gloves
- A small saucepan
- A spoon or squeeze bottle
2. Preparing the Batter

- Preheat the oven to 350°F (175°C) and grease two 8-inch cake pans.
- In a large bowl, beat the butter and sugar until light and fluffy.
- Add eggs one at a time, mixing well after each addition.
- In a separate bowl, whisk together flour, baking powder, baking soda, cocoa powder (if you’re making a chocolate cake), and salt.
- Alternate adding the dry ingredients and buttermilk into the butter mixture, starting and ending with dry ingredients.
- Pour the batter evenly into the cake pans and bake for 30-35 minutes.
- Let the cakes cool completely before assembling.
3. Frost The Cake Base

Demold the cake from one pan and set it aside to make the throne. After demolding the other cake, frost it and pour the red food coloring into it to create the drip effect.
How to Make the Red Drip Effect?
- Heat ½ cup of heavy cream in a small saucepan until it’s hot but not boiling.
- To melt the Chocolate, add 1 cup of white chocolate or candy melts to the hot cream and stir until smooth.
- Add red gel food coloring a little at a time, mixing thoroughly until the mixture reaches a deep, blood-red shade.
- Let the ganache cool for about 5 minutes so it thickens slightly but is still pourable.
- You can use a spoon to gently pour the ganache and let it drip down the sides. Or, use a squeeze bottle for more control over the drips.
- Place the cake in the fridge for 10–15 minutes to help the drips firm up.
4. Building the Shape of the Cake

Demold the second cake. Start by taking one of your cakes and using a serrated knife to carefully cut out the chair arms and backboard for the throne. Follow a reference design to shape these pieces properly. You can use the extra cake scraps for snacking or even making a mini cake. It is totally up to you!
Next, place the cake on a cake board or sheet and spread an evenly sized layer of frosting. Then, stack the cake on top of it and frost again. Once the base is ready, attach the armrests and backboard pieces to the stacked cakes, securing them with frosting to ensure stability. Finally, cover the entire cake, including the throne pieces, with frosting and smooth it out.
5. Making the Fondant

To color your fondant, you have two options: You can either work with one large piece or divide it into smaller portions. Working with smaller portions is usually easier since they are simpler to knead. In this case, 4.5 kg of fondant was divided into three portions. Then, you can add one teaspoon of black food coloring gel to each portion and knead until the color becomes a smooth, even dark gray charcoal. This step required the most effort because achieving an even color takes time and patience.
Once the fondant is colored, it’s time to roll it out. Choose a clean, flat surface, such as a countertop, ensuring it is free from dust or debris so the fondant doesn’t pick up unwanted particles. Then, roll out enough fondant to cover your cake completely.
6. Covering the Throne with Fondant

To create a throne-like structure, cover your cake with fondant. Place three 8×8-inch squares over the sides and back of the cake. To make the joins where the fondant pieces meet less noticeable, place them at the back of the chair and on each armrest. Next, drape the 8×12-inch fondant piece from the top of the backrest down to the seat, covering the chair smoothly.
Take a paring knife and cut sharp, jagged edges at the base of the fondant to give it a rough, throne-like appearance, making it look more like the Iron Throne from Game of Thrones.
7. Decorating with Swords and Final Touches

Make the swords using fondant, place them along the edges, and join them to hide the fondant’s meeting points on the throne. Use a silver mist sugar spray to give the swords a realistic metallic look. If you want to personalize the throne, you can add a custom message or toppers on top.
Conclusion
Bringing Game of Thrones to life in cake form is easier than you think! Whether you go for a House Stark, House Targaryen, or Iron Throne design, this cake is bound to impress. And remember, you don’t need to be a pro to make it.
If you’re completely new to baking and unsure about making a cake, or if customizing a design seems challenging, WarmOven is the perfect option. Share your ideas, and we’ll bring them to life! We provide a hassle-free experience, with 2-hour doorstep delivery on regular cakes and 1-day delivery for custom cakes.
Order now to take advantage of the 10% discount on orders above ₹700/—and make your next celebration extra sweet.